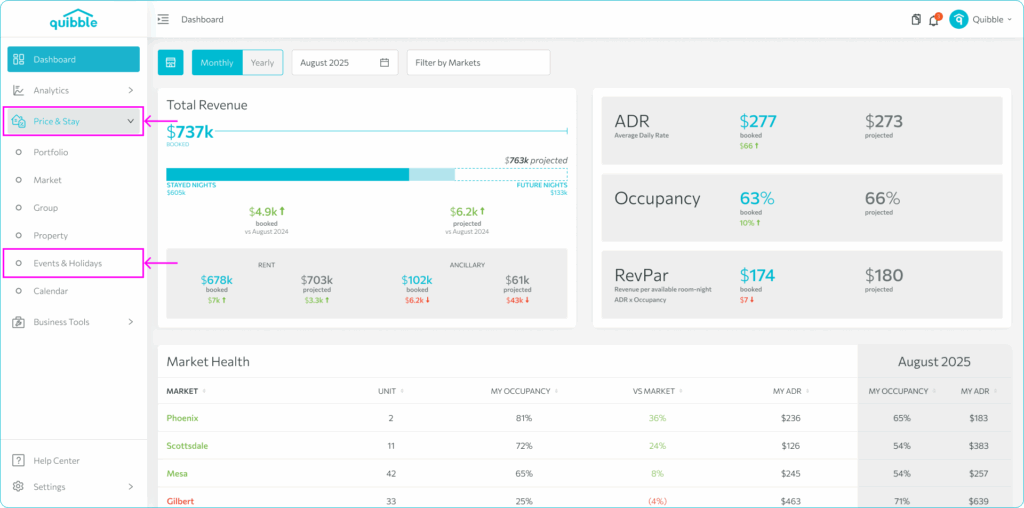
Setting customized pricing for special events and holidays can significantly impact your revenue. This guide will show you how to access the Events Pricing feature and walk you through creating, customizing, and applying dynamic pricing to events and holidays to optimize your revenue strategy.
How to use the events pricing?
Creating an event with customized pricing involves a few key steps:
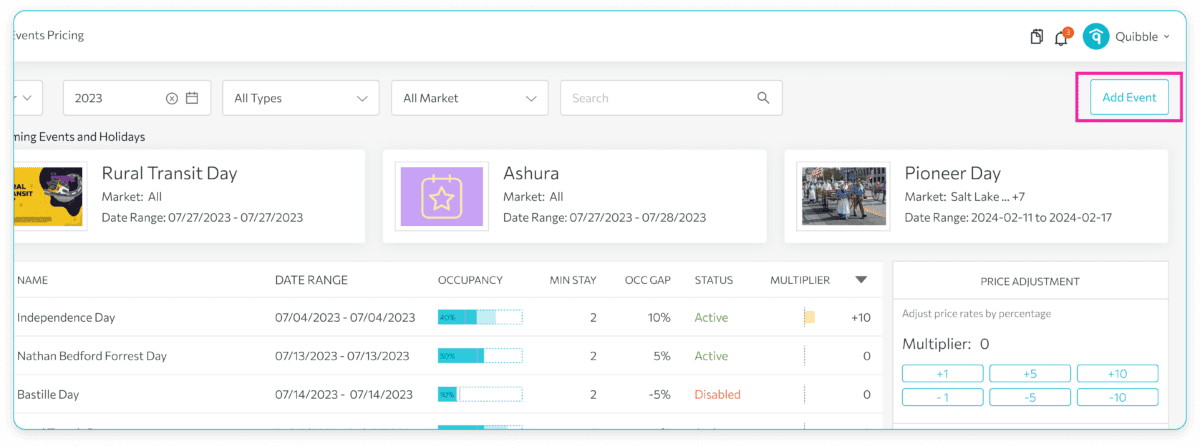
1. To get started, click the “Add Event” button from the upper right corner.
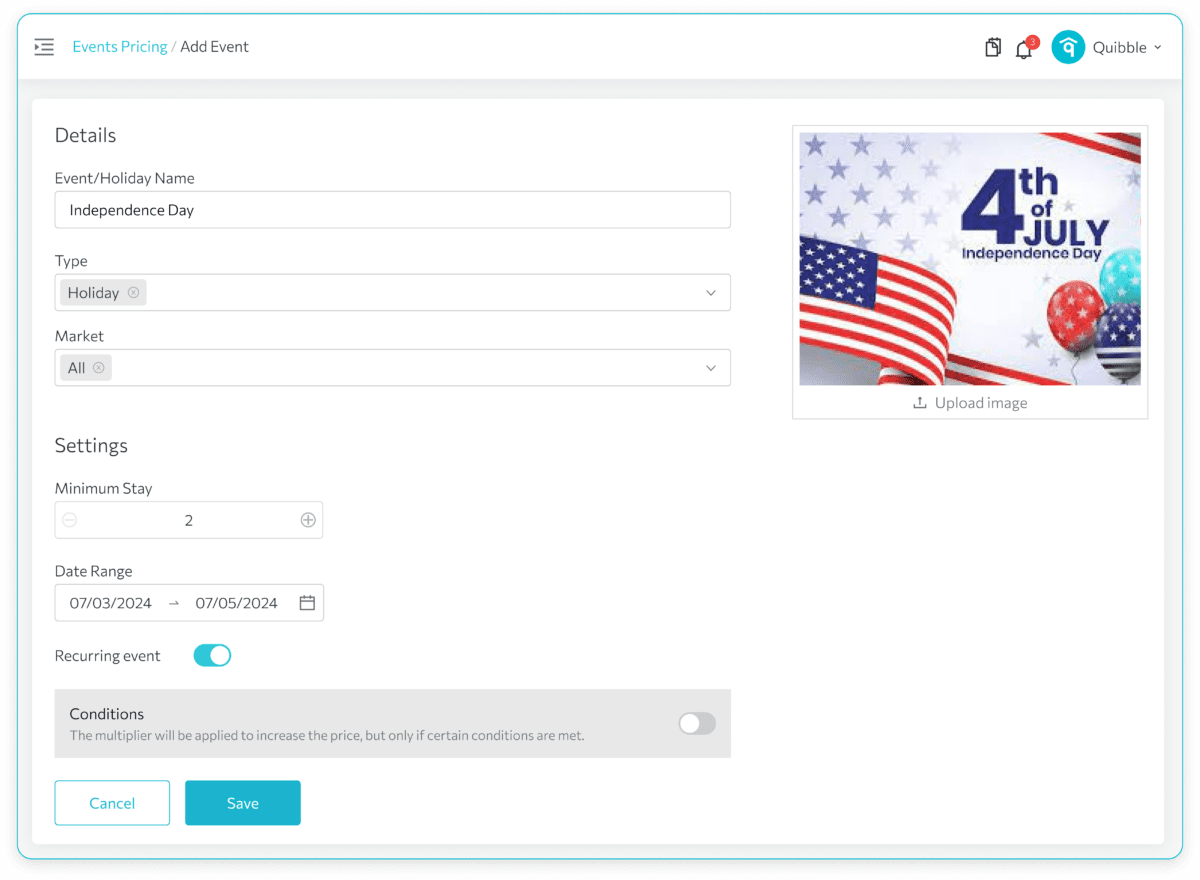
2. Fulfill the following fields to create an event:
- Event/Holiday Name
- Type – choose whether it’s an event or a holiday from the dropdown menu.
- Market – you can select a specific, multiple, or all markets.
- Set the Minimum Stay
- Date Range – choose the date/s for the event.
- Recurring event – toggle the button on if this event should recur over time.
- Upload image – add an image to represent the event or holiday, if needed.
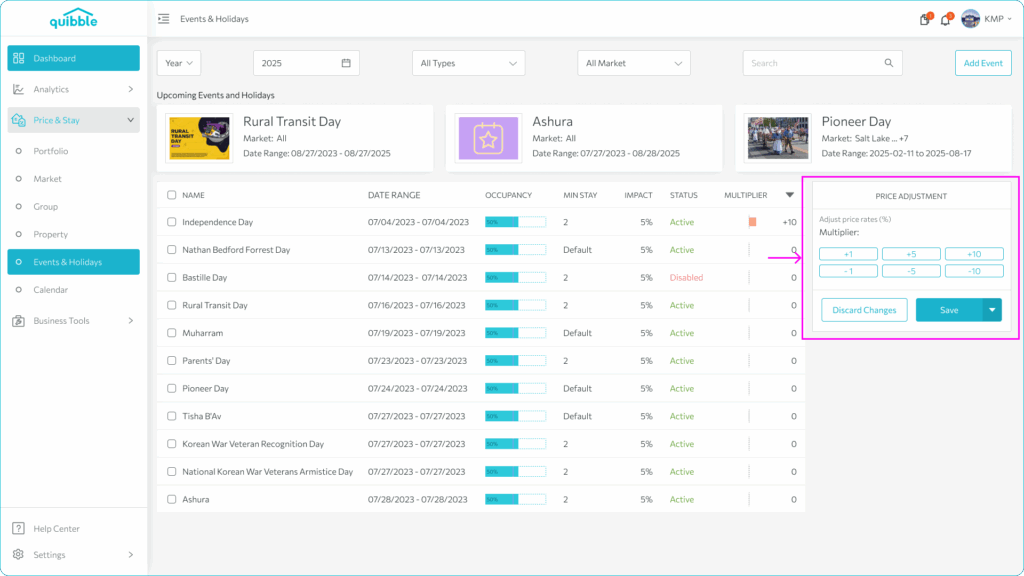
3. After creating the event, select it from the list and choose the pricing multiplier to apply.
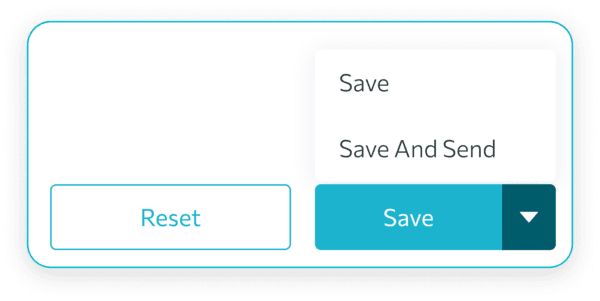
4. Finally, click “Save” to apply changes before the end of the day or “Save and Send” for real-time application.
We hope this guide has been helpful in setting up dynamic pricing for your events and holidays. Don’t forget to check out our other articles and resources for additional tips and best practices.


